Mulesoft Performance Tunning

API Performance Tunning
  1. Keep the application synchronous if possible. Synchronous flows avoid serialization/deserialization of messages sent through VM queues, do not cause context switches, and do not cause contention when messages move across thread pools.
  1. Store as little as possible in variables. The vars are serialized and deserialized every time a message crosses an endpoint, even if it is a VM endpoint. This will impact performance overhead in direct proportion to the size of variables and the number of endpoints. 
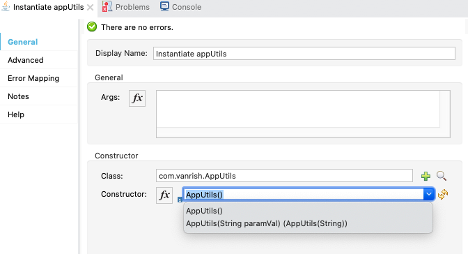
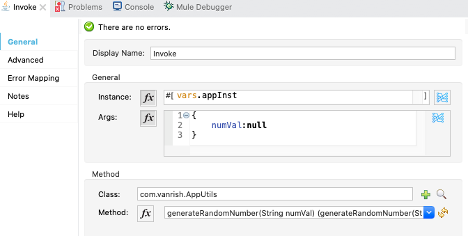
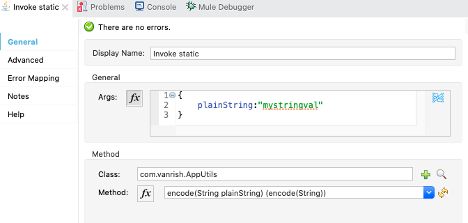
  1. Use Dataweave Java payloads whenever possible. The usage of a canonical data model is recommended for projects that deal with data (mapping, transformation etc.). It is also recommended to create them in Java objects as dataweave whenever possible, as this provides the fastest format to access fields and change information and to convert to other formats.
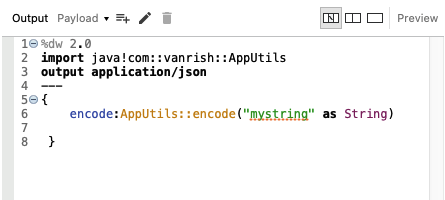
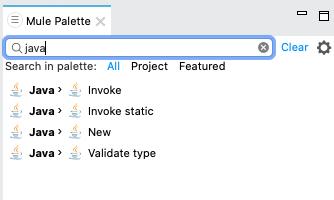
  1. Encourage dataweave  languages. For better performance, use Dataweave for simple data extraction from messages, and Java components with dataweave for everything else. 
  1. Use flow references instead of VM endpoints. To communicate between flows internally within an application, use flow references instead of VM endpoints. The VM connector, even though it is an in-memory protocol, emulates transport semantics that serialize and deserialize parts of your messages, most notably the vars. This makes it slower than a flow reference, which just injects messages into the referenced flow with no intermediate steps. Please note that in some cases the usage of VM endpoints is preferred (see the chapter on reliability patterns). For example, a Mule cluster can load balance applications that use VM endpoints by deferring execution to another, available node in the cluster.
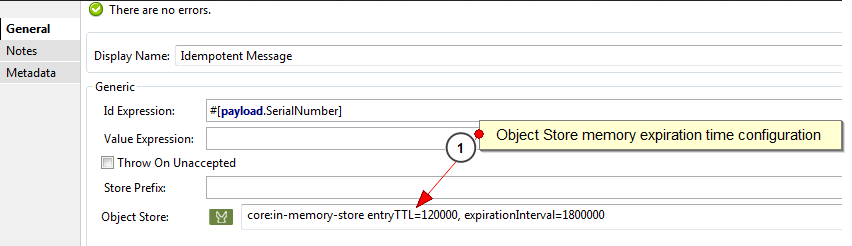
  1. Cache aggressively. Take advantage of Mule’s caching scope when making requests to external resources like Web services or databases. Also consider caching reusable assets such as security tokens or ephemeral API keys and cookies. Mule’s Notification subsystem can additionally be used to “warm up” a cache when Mule starts. For example, consider doing this for situations where an initial cache miss is not acceptable.
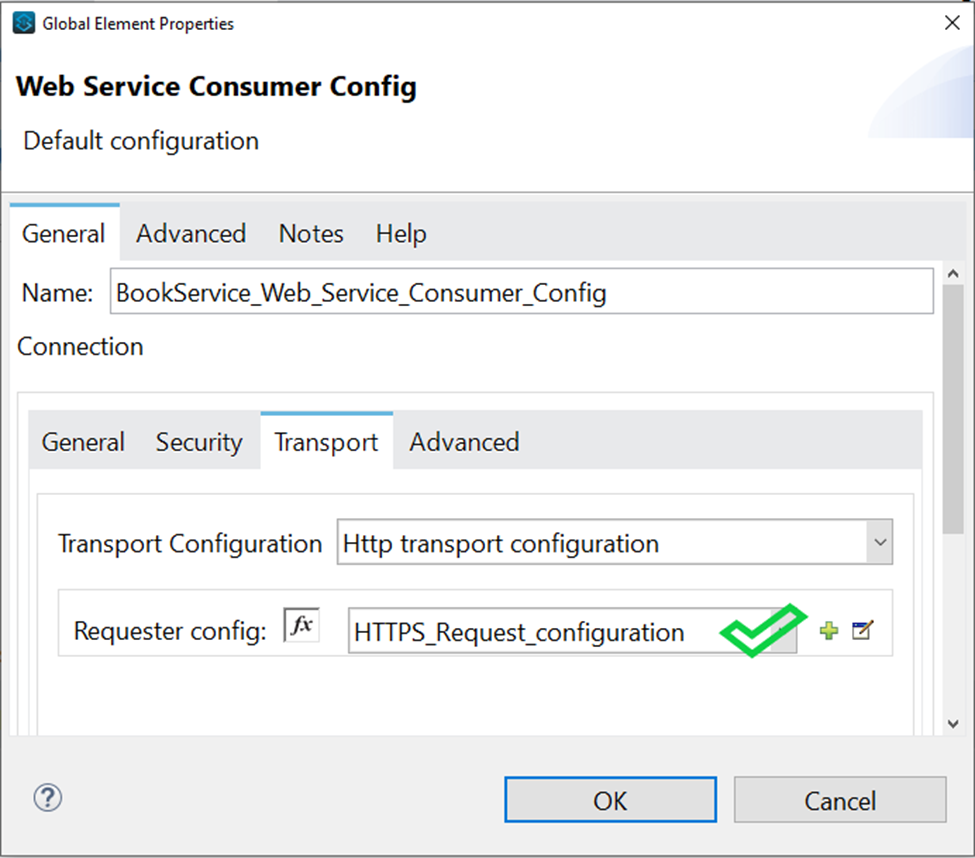
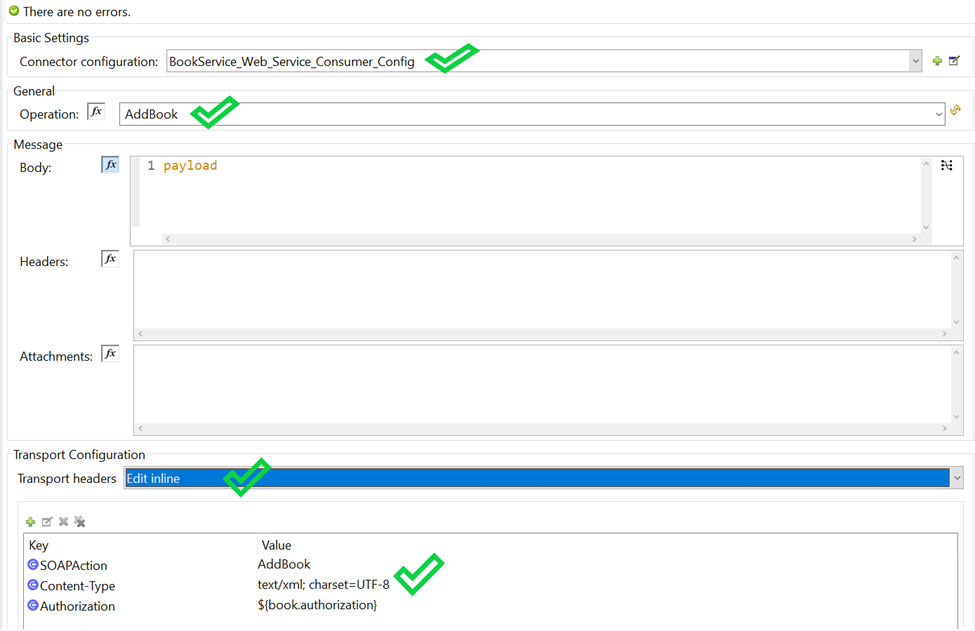
  1. Configure message processors and endpoints at the global level. Some connectors allow you to configure some parameters at both the global and the endpoint/message processor level. We recommend placing the configuration at a global level to avoid repeated initialization of resources. 
  1. Avoid creating a large volume of business events. Business events incur performance overhead in Mule and in platform when platform’s internal event buffer overflows. Thus, avoid using either default flow level business events or a large volume of custom business events in a high message volume project.
  1. Consider using message compression. For communicating between Mule applications over the network consider using Mule’s compression processors to compress/decompress the message payloads before they hit the wire if their sizes are large.
  1. Consider using VM queues instead of an external message broker. VM queues are fast and have some guaranteed delivery semantics in a cluster. Consider using these instead of going out to an external messaging broker for inter-application Mule communication.
  1. Use the async scope when appropriate. If a flow is performing processing on a message that is neither modifying the message nor changing how it is routed, then it could be wrapped in an async block. This will cause the processing to occur in a different thread and will avoid adding unnecessary overhead to processing the message.
  2. Use connection pooling for connectors because the performance cost of establishing a connection to another data source, such as a database, is relatively high.
  3. Optimize your logging within your mule flows. Too much logging will slow down your process and too less logging will hard to debug.
  4. Encryption and decryption of data is very costly. Whenever your Mule application really needs then apply encryption/decryption on your data.

Anypoint Platform: External (OKTA) Identity Management

Anypoint Platform acts as a client provider by default, but you can also configure external client providers to authorize client applications. As an API owner, you can apply an OAuth 2.0 policy to authorize client applications that try to access your API. You need an OAuth 2.0 provider to use an OAuth 2.0 policy. You can configure more than one client provider and associate the client providers with different environments. If you configure multiple client providers after you have already created environments, you can associate the new client providers with the environment. 

MuleSoft supports client management by identity providers that implement the OpenID Connect Dynamic Client Registration open standard. MuleSoft explicitly verifies support in Anypoint Platform for Salesforce, Okta, and OpenAM v14 Dynamic Client Registration. The following table contains examples of the URLs you need to supply, depending on your provider, during registration.

URL NameOkta Example URLOpenAM Example URLSalesforce Example URL
Base https://example.okta.com/oauth2/v1 https://example.com/openam/oauth2 https://example.salesforce.com/services/oauth2
Client Registration {BASE URL}/clients {BASE URL}/connect/register {BASE URL}/register
Authorize {BASE URL}/authorize {BASE URL}/authorize {BASE URL}/authorize
Token {BASE URL}/token {BASE URL}/access_token {BASE URL}/token
Token Introspection {BASE URL}/introspect {BASE URL}/introspect {BASE URL}/introspect
URL Name Okta Example URL OpenAM Example URL Salesforce Example URL

Steps to Create External Client Provider

  • Log in to Anypoint Platform using an account that has the organization administrator role.
  • In Anypoint Platform, click Access Management.
  • In the menu on the left, click Client Providers.

  • Click Add Client Provider, and then select OpenID Connect Dynamic Client Registration.
    The Add OIDC client provider page appears.
  • After obtaining values from your identity provider’s configuration, complete the following required fields in each section:
    • Dynamic Client Registration
      • Issuer: URL that the OpenID provider asserts is its trusted issuer.
      • Client Registration URL: The URL to dynamically register client applications as a client application for your identity provider.
      • Authorization Header
        • For Okta, this value is SSWS ${api_token}, where api_token is an API token created through Okta.
        • For ForgeRock, this value is Bearer ${api_token}, where api_token is an API token created through ForgeRock.
        • For Salesforce, this value is Bearer ${api_token}, where api_token is an API token created through Salesforce. In Advanced Settings you can also select:
      • Disable server certificate validation: Disables server certificate validation if your OpenID client management instance presents a self-signed certificate, or one signed by an internal certificate authority.
      • Enable client deletion in Anypoint Platform: Enables deletion of clients created with this integration.
      • Enable client deletion and updates in IdP: To use this option, you must also select the Enable client deletion in Anypoint Platform option.
    • Token Introspection Client
      • Client ID: The client ID for an existing client in your IdP capable of introspection of all tokens from all clients.
        • For Okta, this value should be a “Confidential” client.
        • For ForgeRock, this value should be a “Confidential” client.
        • For Salesforce, this value should be a “Confidential” client.
      • Client Secret: The client secret that corresponds to the client ID.
    • OpenID Connect Authorization URLs
      • Authorize URL: The URL where the user authenticates and grants OpenID Connect client applications access to the user’s identity.
      • Token URL: The URL that provides the user’s identity, encoded in a secure JSON Web Token.
      • Token Introspection URL: endpoint that returns metadata about the access token, including expiration and token active state.

Mule 4: Consume a SOAP Webservice

The Web Service Consumer is an existing connector in Mule 4 that you can configure to point to a SOAP based web service. Webservice consumer call webservice hosted elsewhere as WSDL SOAP services and get response. This connector simplified process and encapsulated all the feature to consume SOAP based webservice. When no connector is available specific to any product (like Service-Now, Workday etc.), which is hosted as SOAP based webservice then this webservice consumer Connector enables any services to consume.

The main feature of this connector is

  • Consuming DOC Literal Web services.
  • SOAP multipart messages.
  • SOAP Headers.
  • DataSense support for SOAP Headers, SOAP Body, and Attachment.
  • Embedded DataWeave transformations inside the operation.
  • Support and Unified experience for SOAP with attachments and MTOM handling.
  • Custom HTTP configuration as transport (runtime and design time).
  • Web Service Security (WS Security) support.

Connector Configuration- In this section we define connector configuration to communicate with SOAP based webservice end point. By default, connector uses a simple non protected HTTP configuration to send all outgoing SOAP message.  In connector configuration you can select your SOAP version from drop down  and provide WSDL location. Connector extract and populates Service, Port and webservice endpoint address from WSDL file.

But if you are using secure endpoint address with HTTPS you need to configure custom Transportation Configuration for HTTPS.

These are the steps to enable your secure HTTPS endpoint.

  • Create jks file with keytool command
 keytool -keystore clientkeystore.jks -genkey -alias client 
  • Download certificate from WSDL HTTPS endpoint and add this certificate in your JKS file with below command
keytool -importcert -file certificate.cer -keystore clientkeystore.jks -alias "Alias"
  • Now configure TLS Context for Webservice consumer connector.
<tls:context name="TLS_Context" doc:name="TLS Context" doc:id="f634b824-2695-4d5f-8789-7a309b1511cb" >
           <tls:trust-store path="certificate/clientkeystore.jks" password="xxxxxx" type="jks" />
     </tls:context>
  • Now configure HTTP Request configuration for HTTPS endpoint.
<http:request-config name="HTTPS_Request_configuration" doc:name="HTTPS Request configuration" doc:id="02db1fd9-9f04-4eae-83cf-df43effd25d2">
           <http:request-connection protocol="HTTPS" host="service.vanrish.com" port="443" tlsContext="TLS_Context">
     	   </http:request-connection>
	</http:request-config>

  • If TLS and HTTPS configuration configured then you can select HTTP request configuration from Webservice consumer
<wsc:config name="BookService_Web_Service_Consumer_Config" doc:name="Book Web Service Consumer Config" doc:id="59fd0d73-f90d-4cf0-9855-c008307067a2" >
 <wsc:connection wsdlLocation="wsdl\bookservice.wsdl" service="BookService" port="BookServicePort" address="https://service.vanrish.com:443/service/BookService">
  <wsc:custom-transport-configuration >
    <wsc:http-transport-configuration requesterConfig="HTTPS_Request_configuration"/>
  </wsc:custom-transport-configuration>
 </wsc:connection>
</wsc:config>

Connector Parameter- If connector configuration is configured properly, your operation parameters are available from WSDL as drop down options.

In Message section there are three parameters available

  1. Body – The Body is main part of the SOAP message. The body element accepts embedded DataWeave scripts as values so that you can construct the XML request without having a side effect on the message or having to use multiple components to create the request.
  2. Headers – The headers element contains application-specific information (like authentication, payment, and so on) about the SOAP message . This elements accepts embedded DataWeave scripts as values.
  3. Attachment – The attachments element enables you to bind attachments to the SOAP message. This element also accepts embedded DataWeave scripts as values.

Since you configured custom HTTPS connector for your webservice consumer Connector you can configure Transport Configuration. In Transport header section you can select “Edit inline” and add all your header parameters in line

<wsc:consume doc:name="Consume" doc:id="ca5a1247-7cf6-4c7f-a442-b6fd037c13c9" config-ref="BookService_Web_Service_Consumer_Config" operation="AddBook">
       <wsc:transport-headers >
          <wsc:transport-header key="SOAPAction" value="AddBook" />
          <wsc:transport-header key="Content-Type" value="text/xml; charset=UTF-8" />
          <wsc:transport-header key="Authorization" value="${book.authorization}" />
       </wsc:transport-headers>
 </wsc:consume>

Here is webservice consumer flow diagram

Code for this flow

<?xml version="1.0" encoding="UTF-8"?>
<mule xmlns:ee="http://www.mulesoft.org/schema/mule/ee/core"
	xmlns:http="http://www.mulesoft.org/schema/mule/http" xmlns:tls="http://www.mulesoft.org/schema/mule/tls"
	xmlns:wsc="http://www.mulesoft.org/schema/mule/wsc"
	xmlns="http://www.mulesoft.org/schema/mule/core" xmlns:doc="http://www.mulesoft.org/schema/mule/documentation" xmlns:xsi="http://www.w3.org/2001/XMLSchema-instance" xsi:schemaLocation="
http://www.mulesoft.org/schema/mule/ee/core http://www.mulesoft.org/schema/mule/ee/core/current/mule-ee.xsd http://www.mulesoft.org/schema/mule/core http://www.mulesoft.org/schema/mule/core/current/mule.xsd
http://www.mulesoft.org/schema/mule/wsc http://www.mulesoft.org/schema/mule/wsc/current/mule-wsc.xsd
http://www.mulesoft.org/schema/mule/tls http://www.mulesoft.org/schema/mule/tls/current/mule-tls.xsd
http://www.mulesoft.org/schema/mule/http http://www.mulesoft.org/schema/mule/http/current/mule-http.xsd">
	
	<wsc:config name="BookService_Web_Service_Consumer_Config" doc:name="Book Web Service Consumer Config" doc:id="59fd0d73-f90d-4cf0-9855-c008307067a2" >
            <wsc:connection wsdlLocation="wsdl\bookservice.wsdl" service="BookService" port="BookServicePort" address="https://service.vanrish.com:443/service/BookService">
	            <wsc:custom-transport-configuration >
					<wsc:http-transport-configuration requesterConfig="HTTPS_Request_configuration" />
				</wsc:custom-transport-configuration>
            </wsc:connection>
     </wsc:config>

	<tls:context name="TLS_Context" doc:name="TLS Context" doc:id="f634b824-2695-4d5f-8789-7a309b1511cb" >
           <tls:trust-store path="certificate/clientkeystore.jks" password="changeit" type="jks" />
     </tls:context>

    <http:request-config name="HTTPS_Request_configuration" doc:name="HTTPS Request configuration" doc:id="02db1fd9-9f04-4eae-83cf-df43effd25d2">
           <http:request-connection protocol="HTTPS" host="service.vanrish.com" port="443" tlsContext="TLS_Context">
     	   </http:request-connection>
	</http:request-config>

	<sub-flow name="addbook-ServiceSub_Flow" doc:id="511f0969-0b7d-4b7e-a113-60ef03e97648" >
             <logger level="INFO" doc:name="Logger" doc:id="e6bd0106-e512-4fdd-97cf-1dbd77e1e0e7" message="Entering into AddBook flow"/>
                             <ee:transform doc:name="Transform Message" doc:id="06cc17de-86a9-4c53-a2f4-167d9561bed9" >
                                           <ee:message >
                                                          <ee:set-payload ><![CDATA[%dw 2.0
 output application/xml skipNullOn="everywhere"
 ns n0  https://www.service.vanrish.com/BookService/
  ---
   n0#AddBook:
         {
                 n0#Book : {
                 	ID: payload.id,
                 	Title : payload.title,
                 	Author : payload.author
                 }
         }]]></ee:set-payload>
                                           </ee:message>
                             </ee:transform>
                             <logger level="INFO" doc:name="Logger" doc:id="ce84f628-7b38-4d2d-b5e3-9fdded2c9289" message="soap request --> #[payload]"/>
                             
<wsc:consume doc:name="Consume" doc:id="ca5a1247-7cf6-4c7f-a442-b6fd037c13c9" config-ref="BookService_Web_Service_Consumer_Config" operation="AddBook">
                                           <wsc:transport-headers >
                                                          <wsc:transport-header key="SOAPAction" value="AddBook" />
                                                          <wsc:transport-header key="Content-Type" value="text/xml; charset=UTF-8" />
                                                          <wsc:transport-header key="Authorization" value="${book.authorization}" />
                                           </wsc:transport-headers>
                             </wsc:consume>
                             <logger level="INFO" doc:name="Logger" doc:id="680d69e0-2b01-480c-afe7-660ca22b2f9f" message="AddBook Output-->#[payload]"/>
                             <ee:transform doc:name="Transform Message" doc:id="72d26561-107a-4c6e-a7d4-85bd18e0d316" >
                                           <ee:message >
                                                          <ee:set-payload ><![CDATA[%dw 2.0
ns ns0 https://www.service.vanrish.com/BookService/
 

output application/json skipNullOn="everywhere"
---
payload.body.ns0#AddBookResponse]]></ee:set-payload>
                                           </ee:message>
                             </ee:transform>
                             <logger level="INFO" doc:name="Logger" doc:id="ea517185-efa4-4bf2-a03f-e8bd4d308e80" message="Output AddBook --> #[payload]"/>
              </sub-flow>
</mule>

Mulesoft 4: Using Java in Dataweave 2.0

Mule 4 introduces DataWeave 2.0 as the default expression language replacing Mule Expression Language (MEL). DataWeave 2.0 is tightly integrated with the Mule 4 runtime engine, which runs the scripts and expressions in your Mule application.

Since Dataweave 2.0 is default expression language for Mule 4, Dataweave can use almost all place within your Mule application. So, In some use-case Dataweave needs to call java method or instantiate java class to execute java complex business logic.

In my previous blog I explained usage of java within Mulesoft flow. In this blog I am explaining usage of java within Dataweave 2.0.

There are 2 ways we can use java within Dataweave code

  1. Calling java method
  2. Instantiate Java class
1. Calling java method There is restriction with Dataweave when calling to java. you can only call Static methods via DataWeave (methods that belong to a Java class, not methods that belong to a specific instance of a class). Before making a method call from java class, you must import the class.

Here is Dataweave code

In dataweave this method can use multiple way

Import only method instead of the whole class:

%dw 2.0
import java!com::vanrish::AppUtils:: encode
output application/json
---
{
encode:encode("mystring" as String)
}

import and call it in a single line:

%dw 2.0
output application/json
---

    encode: java!com::vanrish::AppUtils:: encode ("mystring" as String)
}
2. Instantiate Java class Dataweave allows to instantiate a new object of any java class but you can’t call its instance method through dataweave. You can refer it as variables.

%dw 2.0
import java!com::vanrish::AppUtils
output application/json
---
{
     value: AppUtils::new().data
}

AppUtils.java

package com.vanrish;

import sun.misc.BASE64Encoder;
/**
 * @author rajnish
 */
public class AppUtils{
	public static final BASE64Encoder encoder = new BASE64Encoder();
        private String data;
	
	/**
	 * @param plainString
	 * @return
	 */
	public static String encode(String plainString)
	{
		String encodedString = encoder.encodeBuffer(plainString.getBytes());
		return encodedString;
	}

/**
	 * @param dataStr
	 * @return
	 */
	public String getData(String dataStr)
	{
              data = dataStr+" : test";
              return  data;
	}
}

MuleSoft 4: Using Java in Mule Flow

MuleSoft is a lightweight integration and API platform that allows you to connect anything anywhere and enable your data through API. Mule evolved from java and spring framework. MuleSoft supports multiple language although all Mule module are developed in java.

 Since Mule evolved from java it has capability to use direct java class and method in Mule flow. This capability gives flexibility to Mule developer to use java for complex business logic.

There are several ways you can use java within Mule. Here are some of Java modules available to use within MuleSoft application

There are 4 java modules are available in MuleSoft flow

  1. New
  2. Invoke
  3. Invoke static
  4. Validate type

To explain all these components and uses in Mule flow I created Utils.java and AppUtils.java classes

1. New – AppUtils.java class instantiation can be achieved by calling constructor of this class through MuleSoft New component within Mule flow.

AppUtils java class defined 2 contractors, So Mule constructor properties for NEW component is showing 2 options.

New module without parameter

<java:new doc:name="Instantiate appUtils" doc:id="22ddcb7e-82ed-40f8-bc11-b779ceedd1a1"
constructor="AppUtils()" class="com.vanrish.AppUtils" target="appInst">
</java:new>

New module with parameter

<java:new doc:name="Instantiate appUtils" doc:id="22ddcb7e-82ed-40f8-bc11-b779ceedd1a1"
constructor="AppUtils(String)" class="com.vanrish.AppUtils" target="appInst">
<java:args ><![CDATA[#[{paramVal:"Hello world}]]]>
</java:new>

In above code, Instance of AppUtils class is created and placed into the “appInst”  target variables to reuse same instance in Mule flow.

New module
2. InvokeIn new java module we instantiate AppUtils.java class and placed into “appInst” variable. Now to use this variable set Invoke module and call one of method define in AppUtils.java class. In AppUtils.java class, there is one non static method “generateRandomNumber” defined with String parameter. In example we call this method through Invoke module.
<java:invoke doc:name="Invoke" doc:id="9348e2cf-87fe-4ff7-958c-f430d0421702"
instance="#[vars.appInst]" class="com.vanrish.AppUtils" method="generateRandomNumber(String)">
<java:args ><![CDATA[
#[{numVal:”100”}]]]></java:args>
</java:invoke>
Invoke module
3. Invoke staticInvoke static java module enable mule flow to call java static method. This is one of the easy ways to call any java method in Mule flow.

Mule code is calling to java static method

<java:invoke-static doc:name="Invoke static" doc:id="bc3e110c-d970-47ef-891e-93fb3ffb61bd" 
class="com.vanrish.AppUtils" method="encode(String)">
<java:args ><![CDATA[#[{plainString:"mystringval"}]]]></java:args>
</java:invoke-static>
Invoke-static module
4. Validate typeValidate type java module use instance of method from java. This module accepts “Accept subtypes” parameter which indicates if the operation should accept all subclasses of a class. By default it acceptSubtypes=“true” which means it will accept all sub class of main class but if it will set as false acceptSubtypes=“false” then during execution the operation throws an error (JAVA:WRONG_INSTANCE_CLASS)
<java:validate-type doc:name="Validate type" doc:id="288c791c-50eb-4be0-b924-56481dfdc023"
class="com.vanrish.Utils" instance="#[vars.appInst]" acceptSubtypes="false"/>
Validate-type module

Java in Mule flow diagram

java in Mule flow

Utils.java

package com.vanrish;

public class Utils{
	
}

AppUtils.java

package com.vanrish;
import java.util.Random;
import sun.misc.BASE64Encoder;
/**
 * @author rajnish
 */
public class AppUtils extends Utils {
	public static final BASE64Encoder encoder = new BASE64Encoder();
	//Constructor without Parameter
	public AppUtils(){
		System.out.println("Constructor with no parameter");
	}
	//Constructor with Parameter
  public AppUtils(String paramVal){
		System.out.println("Constructor with parameter value="+paramVal);
	}
	/**
	 * @param String
	 * @return
	 */
	public  String generateRandomNumber(String numVal) {
		Integer numNoRange = null;
		  Random rand = new Random();
		  if(numVal !=null) {
			  numNoRange = rand.nextInt(new Integer(numVal));
		  }else {
		   numNoRange = rand.nextInt();
		  }
	    return numNoRange.toString();
	}
	/**
	 * @param plainString
	 * @return
	 */
	public static String encode(String plainString)
	{
		String encodedString = encoder.encodeBuffer(plainString.getBytes());
		return encodedString;
	}
}

Mulesoft Code

<?xml version="1.0" encoding="UTF-8"?>
<mule xmlns:java="http://www.mulesoft.org/schema/mule/java" xmlns:db="http://www.mulesoft.org/schema/mule/db"
xmlns:ee="http://www.mulesoft.org/schema/mule/ee/core" xmlns:http="http://www.mulesoft.org/schema/mule/http" xmlns="http://www.mulesoft.org/schema/mule/core"
xmlns:doc="http://www.mulesoft.org/schema/mule/documentation"
xmlns:xsi="http://www.w3.org/2001/XMLSchema-instance" xsi:schemaLocation="http://www.mulesoft.org/schema/mule/core http://www.mulesoft.org/schema/mule/core/current/mule.xsd
http://www.mulesoft.org/schema/mule/http http://www.mulesoft.org/schema/mule/http/current/mule-http.xsd
http://www.mulesoft.org/schema/mule/ee/core http://www.mulesoft.org/schema/mule/ee/core/current/mule-ee.xsd
http://www.mulesoft.org/schema/mule/hl7 http://www.mulesoft.org/schema/mule/hl7/current/mule-hl7.xsd
http://www.mulesoft.org/schema/mule/db
http://www.mulesoft.org/schema/mule/db/current/mule-db.xsd
http://www.mulesoft.org/schema/mule/java http://www.mulesoft.org/schema/mule/java/current/mule-java.xsd"> <http:listener-config name="HTTP_Listener_config" doc:name="HTTP Listener config" doc:id="af3ce281-bf68-4c7b-83fb-52b2d2506677" > <http:listener-connection host="0.0.0.0" port="8081" /> </http:listener-config> <flow name="helloworldFlow" doc:id="a13826dc-67a1-4cda-8133-bc16a59ddba2" > <http:listener doc:name="Listener" doc:id="82522c77-5c33-4003-820a-7a04b51c3001" config-ref="HTTP_Listener_config" path="helloworld"/> <logger level="INFO" doc:name="Logger" doc:id="b40bc107-1ab5-4a3f-8f20-d7dfb63e5acb" message="entering flow"/> <java:new doc:name="Instantiate appUtils" doc:id="c1854580-f4d4-4e5c-a34d-7ca185152d02" constructor="AppUtils(String)" class="com.vanrish.AppUtils" target="appInst" > <java:args ><! [CDATA[#[{ paramVal:"Hello world" }]]]></java:args> </java:new> <java:invoke doc:name="Invoke" doc:id="9348e2cf-87fe-4ff7-958c-f430d0421702" instance="#[vars.appInst]" class="com.vanrish.AppUtils" method="generateRandomNumber(String)"> <java:args ><![CDATA[#[{ numVal:null }]]]></java:args> </java:invoke> <java:invoke-static doc:name="Invoke static" doc:id="bc3e110c-d970-47ef-891e-93fb3ffb61bd" class="com.vanrish.AppUtils" method="encode(String)"> <java:args ><![CDATA[#[{ plainString:"mystringval" }]]]></java:args> </java:invoke-static> <java:validate-type doc:name="Validate type" doc:id="288c791c-50eb-4be0-b924-56481dfdc023" class="com.vanrish.Utils" instance="#[vars.appInst]"/> <set-payload value="Success" doc:name="Set Payload" doc:id="8b6c9c0b-07c8-4e17-b649-2c24d4da8bea" /> </flow> </mule>

MuleSoft: Cloudhub vCores Usage Optimization

Mulesoft Connect 2019 was wrapped last month in North america. These connects are one of the premier conferences for API led connectivity and digital transformation.These conference brought more content for developers, architects, and business executives across different business domain. At MuleSoft CONNECT plethora of market experts, and business executives including industry’s CEO/CTO,  discussed their Mulesoft experience and democratization of innovation.

During these conferences, I got an opportunity to talk to some business executives about their Mulesoft experiences and challenges.

One of the biggest challenges is to optimize Mulesoft vCore in cloudhub to keep their project in budget. 

Here are few steps in Mulesoft application to keep vCore usage low and project in budget.

1. API Optimization — As per Mulesoft best practices, Mulesoft suggest API led connectivity to expose data to application within or outside of your organization through reusable and purposeful APIs.

The APIs used in an API-led approach to connectivity falls  into three categories:

  • Experience APIs
  • Process APIs 
  • System APIs

When you are working on API led connectivity, do we really need all three layers of APIs every time?

No, It is not necessary to implement all three layers of APIs every time.

API Layers

Here are some of API layers use-case to save vCores usage and optimize APIs led connectivity.

  • Experience APIs — Experience API is similar to process APIs but unlike Process APIs, Experience APIs are more specifically tied to a unique business context, and project data formats, interaction timings, or protocols into a specific channel and context. These  APIs simplifies your front end data, based on different GUI. For example if you are working on PC website or Mobile website, we display data based on user experience, so we need different APIs to show these data, but if your application needs  only data irrespective of user experience we can skip Experience APIs and application can work only on Process APIs or System APIs. This will save some vCores and keep project in budget.
  • Process APIs — Process APIs, if you are working on complex business logic based on different organization department then you can incorporate all these business specific data in process layer and expose these data through process APIs. But if APIs are not incorporating any complex business logic and most of datas are processing through System APIs then in this use-case you can skip Process APIs and expose your data through System APIs. In this way you can save some vCore and keep your project within budget.

2. Salesforce Platform Events Integration – Salesforce integration with Mulesoft is one of the very common integration use-cases. In the old days  Salesforce synced their data through polling. Poll run couple of time in whole day and sync data between different salesforce org. Since this is polling process, it is not easy to predict the volume of data flowing through Mulesoft application during a certain period of time. So in this case, we go with higher mulesoft vCore to avoid any memory leak. 

Salesforce introduced “Platform Events”   the Salesforce Enterprise Messaging Platform on June 2017. After introduction of “Platform Event”,  integration of Mulesoft and salesforce has become very easy. “Platform Event” enterprise messaging service is event based. So any update for any create Object within salesforce generates event and sends payload to salesforce messaging queue. Mulesoft-Salesforce connector read these payload for data sync from Salesforce messaging queue FIFO based. Since this integration is event based, so as soon as Mulesoft receives event from “Platform event” it is processes Platform event message. So any time we have no large set of data to process. In this integration then we can go for lower vCore and execute project within budget. 

3. Batch Process Optimization — Mulesoft allows to process messages in batch. Mule batch process provides a construct for asynchronous processing larger-than-memory data sets that can split into individual records. Mulesoft batch extracting, transforming and loading (ETL) information into a target system like hadoop.

               Mulesoft needs large memory/vCore to run large sets of data in batch process.   These Mulesoft batch process runs max once or twice a day . These Mulesoft batch  hold large number of vCore idle rest of day without any active usage. You can optimize vCore usage and reduce your batching processing cost by following these two steps.

  • Reuse vCore by deploying multiple batch process applications — As you know, batch run certain time of day once or twice. Suppose one batch application is running every midnight and other batch application is running every morning . Both your batch application is taking 1 vCore. So both applications consuming  total 2 vCore.

If you are configuring any CI/CD process like Jenkin/Code build to deploy your batch application into cloud then it is very easy to manage your process to reuse your vCore. Your can configure you CI/CD process to build your application and deploy your application into cloud when you want to run batch. Once batch is done then you un-deploy your application and deploy next batch application on same memory. In this way you can keep reusing your vCore memory and keep your project within budget.

  • Deploy Batch application in on-premise Mulesoft server — As we all know Batch process is simple and easy to maintain application in most to their use-case. In this case it is very easy to maintain on-premise Mulesoft server and deploy your batch application without much worry about vCore usage.

Link:

Salesforce Platform Event Mulesoft Integration : https://www.vanrish.com/blog/2018/10/01/mulesoft-salesforce-platform-events-integration/

Mule 4: Consuming APIs through Mule 4 application

Mulesoft is all about API strategy and digital transformation of your organization through APIs within cloudHub or in premise.  Mulesoft also provides platform for APIs to monitor and analyze the usage, control access and protect sensitive data with security policies. API is at the heart of digital transformation and it enables greater speed, flexibility and agility of any organization.

            Exposing of your APIs is one aspect of your digital transformation strategy, but consuming API is also as important as exposing APIs. Consuming API is either application getting data from APIs or create/update data through APIs. Most of APIs are based on HTTP/HTTPS protocol. In Mule 4 consuming APIs is also start with configuration of HTTP/HTTPs protocol.

Configuration of HTTP/HTTPS— HTTP/HTTPS configuration start with selecting protocol. If API is available through HTTP then select protocol HTTP with default port 80 or change port based on expose API document.  If APIs are available through secured connection, then select HTTPS protocol with default port 443. Fill the Host with your expose API end point without any protocol. Fill the other field with default value.

Authentication of API are available with five different selection

  1. None – No authentication. Available for everyone
  2. Expression – Custom or expression-based authentication
  3. Basic authentication – Username/Password authentication
  4. Digest authentication — web server can use to negotiate credentials, such as username or password, with a user’s web browser
  5. Ntlm authentication — NT (New Technology) LAN Manager (NTLM) . Microsoft security protocols intended to provide authentication, integrity, and confidentiality to users


If you are working on post/patch/put method api to send data into expose api, set some important parameter based on streaming mode. If API are exposed as streaming mode, then you need to mention content-size of streaming otherwise set value as “NEVER”, then you no need to set content-size.

API Get Call – API get call implement GET method of APIs. Implementation of API get call need parameters. Based on these parameters application get set of data. MuleSoft provide 4 ways to pass these parameters or values.

  • Body
  • Headers
  • Query Parameters
  • URI Parameters

Flow for GET Method

API POST/PUT/PATCH Call –

POST – Create data

PUT/PATCH – Update data

Similar to Get method call, for POST/PUT/PATCH method application send API parameters based on API requirement. Since application is creating/Updating data through POST/PUT/PATCH api call, application sends these data through body parameters with content-type.

Flow for POST/PUT/PATCH Method

Here is flow of API GET call

Implemented code

<?xml version="1.0" encoding="UTF-8"?>
<mule xmlns:db="http://www.mulesoft.org/schema/mule/db" xmlns:ee="http://www.mulesoft.org/schema/mule/ee/core"
xmlns:http="http://www.mulesoft.org/schema/mule/http"
xmlns="http://www.mulesoft.org/schema/mule/core" xmlns:doc="http://www.mulesoft.org/schema/mule/documentation" xmlns:xsi="http://www.w3.org/2001/XMLSchema-instance" xsi:schemaLocation="http://www.mulesoft.org/schema/mule/core http://www.mulesoft.org/schema/mule/core/current/mule.xsd
http://www.mulesoft.org/schema/mule/http http://www.mulesoft.org/schema/mule/http/current/mule-http.xsd
http://www.mulesoft.org/schema/mule/ee/core http://www.mulesoft.org/schema/mule/ee/core/current/mule-ee.xsd
http://www.mulesoft.org/schema/mule/db http://www.mulesoft.org/schema/mule/db/current/mule-db.xsd">
 <configuration-properties doc:name="Configuration properties" doc:id="4bfab9b8-5f36-4b72-b335-35f6f7c3627e" file="mule-app.properties" />
 
<http:listener-config name="HTTP_Listener_config" doc:name="HTTP Listener config" doc:id="49f690e3-8636-45a2-a3f3-244fa170f2f0" basePath="/media" >
<http:listener-connection host="0.0.0.0" port="8081" />
</http:listener-config>
<http:request-config name="HTTPS_Request_configuration" doc:name="HTTP Request configuration" doc:id="4e8927df-e355-4dcd-9bdc-bf154ab1146a" requestStreamingMode="NEVER">
<http:request-connection host="api.vanrish.com" port="443" protocol="HTTPS" connectionIdleTimeout="50000" streamResponse="true">
<http:authentication >
<http:basic-authentication username="2xxxxxxx-xxx0-xxbx-bxxf-xxxxxxxc5" password="xxxxxxxx3dxxxxxb153dbxxxxx29cxxx"/>
</http:authentication>
</http:request-connection>
</http:request-config>
<flow name="demo-mediaFlow" doc:id="a55b1d37-b63d-4336-8d8e-5b70bc354078">
<scheduler doc:name="Scheduler" doc:id="9dc041e5-3140-47a1-a13c-39ee3ba59389" >
<scheduling-strategy >
<fixed-frequency timeUnit="SECONDS"/>
</scheduling-strategy>
</scheduler>
<logger level="INFO" doc:name="Logger" doc:id="9bc54079-8718-4dc1-a433-91081dfdabff" message="Get flow Entering ..... "/>
<http:request method="GET" doc:name="Request" doc:id="872f3240-e954-469a-b330-83aa7e40c3db" config-ref="HTTPS_Request_configuration" path="/api/users">
         <http:headers ><![CDATA[#[output application/java
---
{
"client_id" : "xxxx2-d960-4xxx-b5df-4d704ce2xxxx",
"client_secret" : "xxxd5e8663xxxf1b153db732529cxxx",
"Range" : "items=0-2000"
}]]]></http:headers>
<http:uri-params ><![CDATA[#[output application/java
---
{
test : "123"
}]]]></http:uri-params>
     
</http:request>
<logger level="INFO" doc:name="Logger" doc:id="9b733315-038b-4f4c-9c2e-15fc026f0524" message="data coming from GET API ...... total payload size --- #[sizeOf(payload)]"/>
<ee:transform doc:name="Transform Message" doc:id="383e857d-efe7-45df-ab33-b75a073080b7" >
<ee:message >
<ee:set-payload ><![CDATA[%dw 2.0
output application/json
---
payload]]></ee:set-payload>
</ee:message>
</ee:transform>
<logger level="INFO" doc:name="Logger" doc:id="769a6306-ee9a-4f51-94ad-562ad1042c5e" message="Getting data from API #[payload]"/>
</flow>
</mule>

MuleSoft: Salesforce Platform Events
Integration

Summer 2017 Salesforce released new event-driven architect “Platform Events” feature. Salesforce is known for its custom metadata platform, and now it is delivering a custom messaging platform, so Salesforce customers can build and publish their own events. Platform Events enables customer to increase business productivity and efficiency through integration via event. This feature reduces point-to-point integration and expands the existing capability with more integration options like Outbound Messaging, Apex Callouts, and the Streaming API. With platform events, there are two parties to the communication: a sender and a receiver. They are two of the components of an event-driven architecture.

Before going any further, let’s define some of terminology of platform event.

Event — A change in state that is meaningful in a business process. For example, if opportunities are created or updated in salesforce, this action will generate event within salesforce.

Event message – An event message is payload of event. For example, events are generated after creating or updating opportunities. So, this event has all updated data or updated delta of data which comes as payload.

Event producer – Publishing event with event message is event producer. For example, publish opportunities payload after generating event for other system.

Event channel — A stream of events on which an event producer sends event messages and event consumers read those messages.

Event consumer — A subscriber/Event consumer is an event channel that receives messages from the Event Bus. For example, Application which is subscribing event channel to process further is event consumer.

Event-based software architecture

Set Up Platform Events in Salesforce

  1. On the Salesforce page, click the Setup icon in the top-right navigation menu and select Setup.

    Salesforce setup link
  2. Enter Platform Events into the Quick Find box and then select Data > Platform Events.

    Salesforce platform event link
  3. Click New Platform Event.
  4. In the New Platform Event form, please fill all form
    1. Field Label: EnterpriseTestSync
    2. Plural Label: EnterpriseTestSyncs
    3. Object Name: EnterpriseTestSync

      Salesforce platform event configuration
  5. Click Save
  6. It will be redirected to the EnterpriseTestSync Platform Event page. By default, it creates some standard fields.

    Salesforce platform event standard fields
  7. Now you need to create Custom Platform Event fields that correspond to your EnterpriseTestSync. In the Custom Fields & Relationships section, click New to create a field for EnterpriseTestSync.
  8. Make sure that the Enterprise Test Sync API Name is EnterpriseTestSync__e and that Custom Fields & Relationships looks like this.

    Salesforce platform event API name
  9. If you have any trigger for platform event you can create in trigger section.
  10. Click Save.

Save action will create platform event in salesforce. In next section create Mulesoft integration flow

Integration Mulesoft and Plateform Event

To Integrate with Salesforce Platform Events, please download Mulesoft Salesforce connector v8.4.0 or beyond from Anypoint Exchange.

In my example, I am creating application which syncs  salesforce opportunity between two salesforce instances. So, any create or update opportunity will create platform event in salesforce instance. This platform event is subscribed by Mulesoft Salesforce platform event connector in first salesforce instance. Mulesoft  receives platform event and platform message from first salesforce instance. Mulesoft transforms  this platform message into another format of message and publishes into other salesforce platform event. Platform event can be tracked by replay id. Replay id is unique field when Salesforce generates any platform event. Platform event message persist only 24 hrs in platform Event Bus. We can replay this message within 24hrs.

Here are the steps for Mulesoft integration with Salesforce platform event  and  flow to communicate between two Salesforce platform event.

  1. Please configure Salesforce Basic Authentication from global element in Anypoint studio.

    Mulesoft – Salesforce Basic Authentication configuration
    1. Configure Salesforce connector for platform event which listen Salesforce platform event from event channel.
      • Select operation as “Replay streaming channel”
      • Streaming Channel: Add “/event/EnterpriseTestSync__e”. “EnterpriseTestSync__e” is API name from Salesforce platform event. This API listen event with /event/
      • Replay option: There are 3 options
        1. ALL – This option replays all message from event channel
        2. FROM_REPLAY_ID – This option replays only specific event message replay Id
    • ONLY_NEW – This option replay only new event messages from channel.
    • Replay Id: Replay option ALL we pass -1 value. For FROM_REPLAY_ID option we pass specific event message replay Id and for ONLY_NEW we pass -1
    • Check box “Resume from the Last Replay Id” resume from last replay Id and ignore rest.

      Mulesoft – Salesforce platform event subscribe configuration
  2. Once it is configured, it is ready to accept event message from platform event Channel. Add transformation logic to publish platform event into other Salesforce instances.
  3. Configure Salesforce platform event for publish event message into
    • Operation: Publish platform event message
    • Platform Event Name: Opportunity_Event__e
    • Platform Event Message: Default

      Mulesoft – Salesforce platform event publish configuration
    1. Once you configure these ends point application is ready to listen Event from first instance of Salesforce Platform event and publish platform event into other instance of Salesforce.

    Mulesoft – Salesforce platform event flow

    Here is flow of this application

  4. Here is code of this application
<?xml version="1.0" encoding="UTF-8"?>
<mule xmlns:tracking="https://www.mulesoft.org/schema/mule/ee/tracking" 
xmlns:dw="https://www.mulesoft.org/schema/mule/ee/dw"     
xmlns:sfdc="https://www.mulesoft.org/schema/mule/sfdc" 
xmlns="https://www.mulesoft.org/schema/mule/core" 
xmlns:doc="https://www.mulesoft.org/schema/mule/documentation"     
xmlns:spring="https://www.springframework.org/schema/beans"     
xmlns:xsi="https://www.w3.org/2001/XMLSchema-instance"     
xsi:schemaLocation="https://www.mulesoft.org/schema/mule/ee/dw https://www.mulesoft.org/schema/mule/ee/dw/current/dw.xsd
https://www.springframework.org/schema/beans https://www.springframework.org/schema/beans/spring-beans-current.xsd
https://www.mulesoft.org/schema/mule/core https://www.mulesoft.org/schema/mule/core/current/mule.xsd
https://www.mulesoft.org/schema/mule/sfdc https://www.mulesoft.org/schema/mule/sfdc/current/mule-sfdc.xsd
https://www.mulesoft.org/schema/mule/ee/tracking https://www.mulesoft.org/schema/mule/ee/tracking/current/mule-tracking-ee.xsd">

<flow name="bu-vanrish-eventFlow">

<sfdc:replay-streaming-channel config-ref="Salesforce__Basic_Authentication" streamingChannel="/event/EnterpriseTestSync__e" replayOption="ALL" replayId="-1" doc:name="Salesforce (Streaming)"/>

<logger message="Before   Transformation -- #[payload]" level="INFO" doc:name="Logger"/>
<dw:transform-message doc:name="Transform Message">
<dw:set-payload><![CDATA[%dw 1.0
%output application/java
---
{
Name__c: payload.payload.Name__c,
StageName__c:payload.payload.StageName__c,
CreatedById:payload.payload.CreatedById,
Amount__c:payload.payload.Amount__c,
Opp_ID__c:payload.payload.Opp_ID__c
}]]></dw:set-payload>
</dw:transform-message>

<logger message="After transformation -- #[payload]" level="INFO" doc:name="Logger"/>

<sfdc:publish-platform-event-message config-ref="Salesforce__Basic_Authentication_van" platformEventName="Opportunity_Event__e" doc:name="Salesforce"/>

<logger message="BU Vanrish complete flow-- #[payload]" level="INFO" doc:name="Logger"/>
</flow>
</mule>

Mulesoft: Twilio API Integration

mulesoft-logoplustwilio

Twilio is a cloud based communication company that enables users to use standard web languages to build voice, VoIP, and SMS apps via a web API. Twilio provides a simple hosted API and markup language for businesses to quickly build scalable, reliable and advanced voice and SMS communications applications. Twilio based telephony infrastructure enable web programmer to integrate real time phone call, SMS or VOIP to their application.

Mulesoft provides cloud connector to integrate Twilio Api within Mulesoft. Mulesoft Cloud connector provides a simple and easy way to integrate with these Twilio APIs, and then use them as services within Mulesoft. Mulesoft-Twilio connector provides a platform for developer to develop and integrate their application easily and quickly with Twilio.

Before start integration of Mulesoft with Twilio, create your Twilio account and get “ACCOUNT SID” and “AUTH TOKEN”.

twilio-account

Now download and install Twilio connector into Anypoint studio.

Anypoint Studio –>Help –>Install New Software

twilio-connector

Configure pom.xml to pull Twilio jar dependency in maven based project.

Add plugin in plugin section and dependency in pom.xml file. This section will also add into pom.xml file when Twilio connector drag into AnypointStudio canvas and use it into flow.

<plugin>
   <groupId>org.mule.tools.maven</groupId>
<artifactId>mule-app-maven-plugin</artifactId>
<version>${mule.tools.version}</version>
<extensions>true</extensions>
<configuration>
<copyToAppsDirectory>true</copyToAppsDirectory>
<inclusions>
<inclusion>
<groupId>org.mule.modules</groupId>
<artifactId>mule-module-apikit</artifactId>
</inclusion>
        <inclusion>
                   <groupId>org.mule.modules</groupId>
                   <artifactId>mule-module-twilio</artifactId>
         </inclusion>
     </inclusions>
</configuration>
</plugin>

Dependency tag

<dependency>
<groupId>org.mule.modules</groupId>
<artifactId>mule-module-twilio</artifactId>
<version>1.4</version>
</dependency>

Now configure Twilio Global Elements to connect your application with Twilio into Mule-config.xml file

<twilio:config name="Twilio" accountSid="${TwilioSID}" authToken="${TwilioAuthToken}" doc:name="Twilio">
<twilio:http-callback-config />
</twilio:config>

In above code TwilioSID and TwilioAuthToken are coming from Twilio account.

Mulesoft Twilio connector provides a  number of methods to integrate with your application. Below image show some of methods expose by Mulesoft-Twilio connector.

twilio-method

I am using “send SMS message” method form Mulesoft-Twilio connector for my example.

Now you can integrate Twilio to send SMS with your application. Here is example code.

<logger message="#[payload.recipientPhoneNumber]" level="INFO" doc:name="Logger"/>
<twilio:send-sms-message config-ref="Twilio" accountSid="${TwilioSID}" body="Hello World Sending SMS from Twilio" from="+15555555555" to="#[payload.recipientPhoneNumber]" doc:name="Twilio"/>

Twilio API does not support bulk SMS for recipient. So, to initiate messages to a list of recipients, you must make a request for each number to which you would like to send a message. The best way to do this is to build an array of the recipients and iterate through each phone number.

Here is small flow for Twilio integration.

twilio-flow

Code for this flow.

<?xml version="1.0" encoding="UTF-8"?>
<mule xmlns:twilio="https://www.mulesoft.org/schema/mule/twilio" xmlns:http="https://www.mulesoft.org/schema/mule/http" xmlns="https://www.mulesoft.org/schema/mule/core" xmlns:doc="https://www.mulesoft.org/schema/mule/documentation"
xmlns:spring="https://www.springframework.org/schema/beans"
xmlns:xsi="https://www.w3.org/2001/XMLSchema-instance"
xsi:schemaLocation="https://www.springframework.org/schema/beans https://www.springframework.org/schema/beans/spring-beans-current.xsd
https://www.mulesoft.org/schema/mule/core https://www.mulesoft.org/schema/mule/core/current/mule.xsd
https://www.mulesoft.org/schema/mule/http https://www.mulesoft.org/schema/mule/http/current/mule-http.xsd
https://www.mulesoft.org/schema/mule/twilio https://www.mulesoft.org/schema/mule/twilio/current/mule-twilio.xsd">

<http:listener-config name="HTTP_Listener_Configuration" host="0.0.0.0" port="8081" doc:name="HTTP Listener Configuration"/>
<twilio:config name="Twilio" accountSid="${TwilioSID}" authToken="${TwilioAuthToken}" doc:name="Twilio">
    <twilio:http-callback-config />
</twilio:config>
  <flow name="twilio-mulesoftFlow">
     <http:listener config-ref="HTTP_Listener_Configuration" path="/twilio" doc:name="HTTP"/>
     <set-payload value="" doc:name="Set Payload"/>
     <logger message="#[payload.recipientPhoneNumber]" level="INFO" doc:name="Logger"/>
     <twilio:send-sms-message config-ref="Twilio" acc#[payload.recipientPhoneNumber]: #339966;">${TwilioSID}" body="#[payload]" from="+15555555555" to="+12222222222" doc:name="Twilio"/>
  </flow>
</mule>

If you are getting exception, make sure twilio-mulesoft jar is in classpath and properly configured.

Mulesoft Polling : A New Perspective

Mulesoft polling is one of the most important features in Mulesoft. If you are dealing with large set of data or asynchronous workflow, polling architect is one of the best options to manage this scenario.
There are two options to configure Mulesoft poll scheduling.

  1. Fixed frequency scheduler – you can define polling time in frequency, start delay and time unit. This is one of the simplest ways to define your polling.
  2. Cron scheduler – Cron scheduler gives ability to use expression language and manage complex scheduling polling.

There is no relationship between two polling. This was challenge for me to get the relationship between two polling so that I can manage my data more efficiently.

Mulesoft gives couple of options to set up relationship between two polls.

Watermark – In polling there is always challenge to process newly created data and keep persist pointer for processed data to avoid duplicate processing. Mulesoft allows us as Watermark to persist this pointer in objectstore. Mule sets a watermark to a default value the first time the flow runs, then uses it as necessary when running a query or making an outbound request. Based on flow Mule may update the original value of the watermark or maintain the original value.
Here is simple flow to show how to implement watermark for poll

Poll Watermark Flow Diagram
poll-watermark

Here is code for this flow


<?xml version="1.0" encoding="UTF-8"?>
  <mule xmlns:schedulers="http://www.mulesoft.org/schema/mule/schedulers" xmlns:tracking="http://www.mulesoft.org/schema/mule/ee/tracking"
   xmlns:http="http://www.mulesoft.org/schema/mule/http" xmlns:mulexml="http://www.mulesoft.org/schema/mule/xml" xmlns="http://www.mulesoft.org/schema/mule/core" xmlns:doc="http://www.mulesoft.org/schema/mule/documentation"
   xmlns:spring="http://www.springframework.org/schema/beans"
   xmlns:xsi="http://www.w3.org/2001/XMLSchema-instance"
   xsi:schemaLocation="http://www.mulesoft.org/schema/mule/db http://www.mulesoft.org/schema/mule/db/current/mule-db.xsd
   http://www.springframework.org/schema/beans http://www.springframework.org/schema/beans/spring-beans-current.xsd
   http://www.mulesoft.org/schema/mule/core http://www.mulesoft.org/schema/mule/core/current/mule.xsd
   http://www.mulesoft.org/schema/mule/http http://www.mulesoft.org/schema/mule/http/current/mule-http.xsd
   http://www.mulesoft.org/schema/mule/xml http://www.mulesoft.org/schema/mule/xml/current/mule-xml.xsd
   http://www.mulesoft.org/schema/mule/ee/tracking http://www.mulesoft.org/schema/mule/ee/tracking/current/mule-tracking-ee.xsd
   http://www.mulesoft.org/schema/mule/schedulers http://www.mulesoft.org/schema/mule/schedulers/current/mule-schedulers.xsd">
  <spring:beans>
     <spring:bean id="dataSourceBean" name="dataSource_Bean" class="org.apache.commons.dbcp.BasicDataSource">
       <spring:property name="driverClassName" value="com.microsoft.sqlserver.jdbc.SQLServerDriver"/>
       <spring:property name="username" value="********"/>
       <spring:property name="password" value="********* "/>
       <spring:property name="url" value="jdbc:jtds:sqlserver://localhost:60520;Instance=CRM;DatabaseName=vanrish;domain=man;integrated security=false"/>
    </spring:bean>
 </spring:beans>
  <db:generic-config name="Generic_Database_Configuration" dataSource-ref="dataSourceBean" doc:name="Generic Database Configuration" >
     <reconnect-forever frequency="30000"/>
  </db:generic-config>
<flow name="poll-watermarking" processingStrategy="synchronous">
  <poll doc:name="Poll">
    <schedulers:cron-scheduler expression="0 22 12 * * ?"/>
    <watermark variable="serialNumber" default-expression="0" selector="LAST" selector-expression="#[payload.serialNumber]"/>
    <db:select config-ref="Generic_Database_Configuration" doc:name="Select Database">
       <db:dynamic-query><![CDATA[SELECT
MessageId, MessageType,SerialNumber,CreatedOn  FROM Message where SerialNumber  > #[Integer.parseInt(flowVars['serialNumber'])] order by SerialNumber asc]]></db:dynamic-query>
    </db:select>
 </poll>
   <logger message="#[flowVars['serialNumber']] == Hello this is Loggin Message == #[payload]" level="INFO" doc:name="Logger"/>
  </flow>
</mule>

Idempotent Filter – Idempotent filter is another way in Mule we can keep track between two polling. This filter ensures that only unique messages are received by a service by checking the unique ID of the incoming message. This filter also store unique id/pointer in objectstore in mule.
Here is simple flow to use Idempotent Filter

Poll Idempotent Filter flow Diagram
poll-idempotent

idempotent-objectStore

Here is code

<?xml version="1.0" encoding="UTF-8"?>
<mule xmlns:schedulers="http://www.mulesoft.org/schema/mule/schedulers" xmlns:tracking="http://www.mulesoft.org/schema/mule/ee/tracking" xmlns:db="http://www.mulesoft.org/schema/mule/db"
  xmlns:cassandradb="http://www.mulesoft.org/schema/mule/cassandradb" xmlns:http="http://www.mulesoft.org/schema/mule/http" xmlns:json="http://www.mulesoft.org/schema/mule/json" xmlns:mulexml="http://www.mulesoft.org/schema/mule/xml" xmlns="http://www.mulesoft.org/schema/mule/core" xmlns:doc="http://www.mulesoft.org/schema/mule/documentation"
  xmlns:spring="http://www.springframework.org/schema/beans"
  xmlns:xsi="http://www.w3.org/2001/XMLSchema-instance"
  xsi:schemaLocation="http://www.mulesoft.org/schema/mule/db http://www.mulesoft.org/schema/mule/db/current/mule-db.xsd
  http://www.springframework.org/schema/beans http://www.springframework.org/schema/beans/spring-beans-current.xsd
  http://www.mulesoft.org/schema/mule/core http://www.mulesoft.org/schema/mule/core/current/mule.xsd
  http://www.mulesoft.org/schema/mule/http http://www.mulesoft.org/schema/mule/http/current/mule-http.xsd
  http://www.mulesoft.org/schema/mule/xml http://www.mulesoft.org/schema/mule/xml/current/mule-xml.xsd
  http://www.mulesoft.org/schema/mule/ee/tracking http://www.mulesoft.org/schema/mule/ee/tracking/current/mule-tracking-ee.xsd
  http://www.mulesoft.org/schema/mule/schedulers http://www.mulesoft.org/schema/mule/schedulers/current/mule-schedulers.xsd">
    <spring:beans>
      <spring:bean id="dataSourceBean" name="dataSource_Bean" class="org.apache.commons.dbcp.BasicDataSource">
        <spring:property name="driverClassName" value="com.microsoft.sqlserver.jdbc.SQLServerDriver"/>
        <spring:property name="username" value="*******"/>
        <spring:property name="password" value="********"/>
        <spring:property name="url" value="jdbc:jtds:sqlserver://localhost:60520;Instance=CRM;DatabaseName=vanrish;domain=man;integrated security=false"/>
      </spring:bean>
    </spring:beans>
    <db:generic-config name="Generic_Database_Configuration" dataSource-ref="dataSourceBean" doc:name="Generic Database Configuration" >
      <reconnect-forever frequency="30000"/>
    </db:generic-config>
    <flow name="poll-idempotent" processingStrategy="synchronous">
      <poll doc:name="Poll">
        <fixed-frequency-scheduler frequency="10000"/>
        <db:select config-ref="Generic_Database_Configuration" doc:name="Select Database">
          <db:dynamic-query><![CDATA[SELECT  MessageId, MessageType,SerialNumber,CreatedOn  FROM Message order by SerialNumber asc]]></db:dynamic-query>
        </db:select>
      </poll>
      <foreach doc:name="For Each">
        <idempotent-message-filter idExpression="#[payload.SerialNumber]" doc:name="Idempotent Message">
          <in-memory-store entryTTL="120000" expirationInterval="1800000"/>
        </idempotent-message-filter>
        <logger message="#[payload.SerialNumber] == Hello this is Loggin Message == #[payload]" level="INFO" doc:name="Logger"/>
      </foreach>
    </flow>
  </mule>