In my previous blog I explained configuration and setup for Mulesoft connector Devkit. In this blog I am going to explain how to write and deploy your connector. As I mentioned in my previous blog Devkit is a platform to develop Mulesoft connector. Devkit is very powerful tool to develop extreme complex connector or simple connector.
Here are few steps to develop Mulesoft connector.
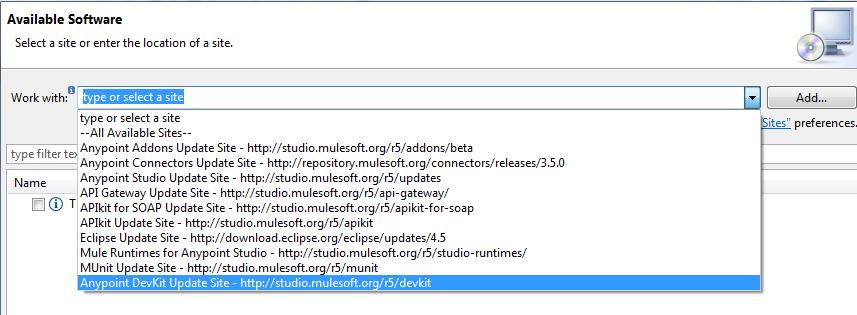
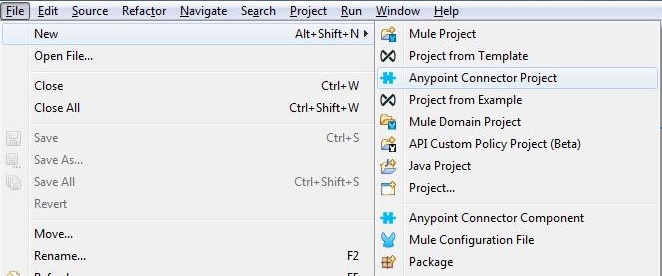
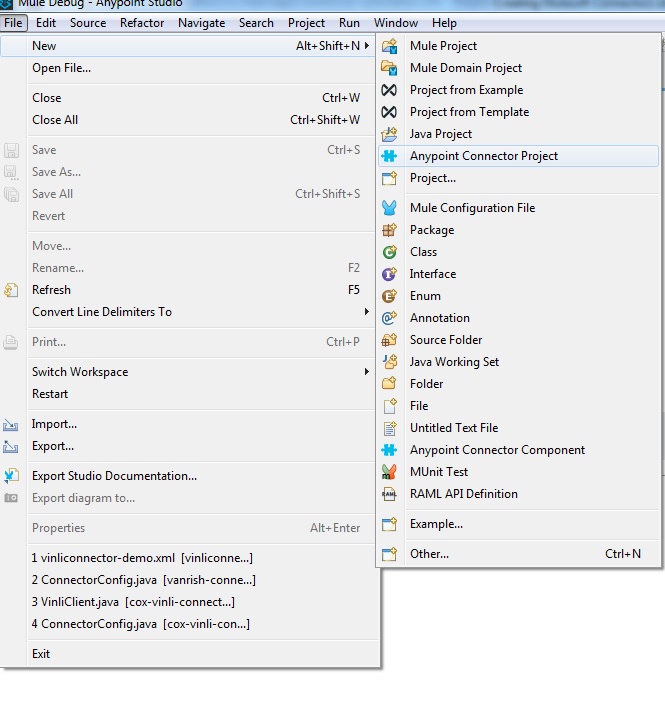
1) Create project from anypoint studio
2) Select SDK Based connector. This selection supports standalone java as well as REST based API. Once you select this selection below window will come. Name your connector project, select working directory and then click next
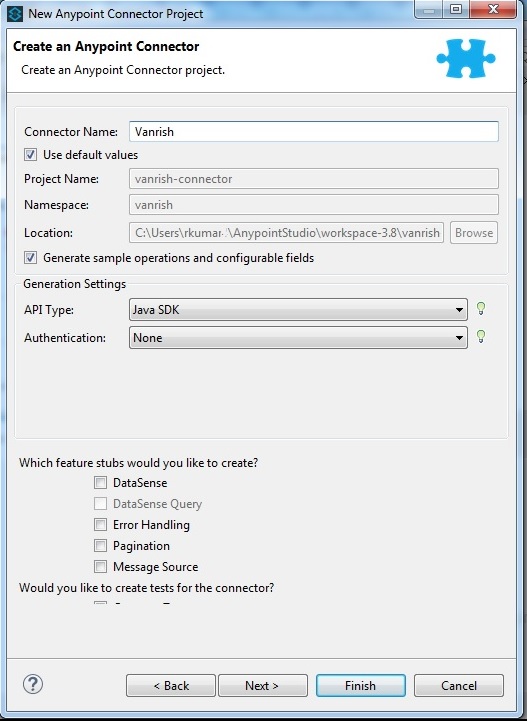
3) Now next step you need to select maven Group Id and Artifact Id and click next.
4) Next step you need to select icon and logo for your connector then click finish.
![]()
After clicking finish connector project will generate.
Two java files are generated in your connector project. Here my project name is Vanrish, so it generated VanrishConnector.java and ConnectorConfig.java.
Generated VanrishConnector.java
@Connector(name="vanrish", friendlyName="Vanrish")

public class VanrishConnector {

@Config
ConnectorConfig config;
In this code snippet annotation defines your connector name and display name. In above annotation “name” is for connector name and “friendlyName” will display connector name once you install this connector in Anypoint studio. This annotated class is main class for creating connector
In 2nd line we are initiating config class to add all configuration related with this connector.
If you are adding any method to execute this connector you need to define your method with @Processor annotated method.
@Processor
public String getVehicleInfo(String deviceId) throws Exception {
return "Hello World"+deviceId;
}
Here is Full code snippet for this class
package org.mule.modules.vanrish;

import org.mule.api.annotations.Config;
import org.mule.api.annotations.Connector;
import org.mule.api.annotations.Processor;
import org.mule.api.annotations.lifecycle.Start;
import org.mule.api.annotations.oauth.OAuthProtected;
import org.mule.modules.vanrish.config.ConnectorConfig;

@Connector(name = "vanrish", friendlyName = "Vanrish")
public class VanrishConnector {

 @Config
 ConnectorConfig config;

 @Start
 public void init() {
 }

 public ConnectorConfig getConfig() {
  return config;
 }

 public void setConfig(ConnectorConfig config) {
  this.config = config;
 }

 @Processor
 public String getVehicleInfo(String deviceId) throws Exception {
  return "Hello World" + deviceId;
 }
}
Now in 2nd class we define connector configuration. This class is annotated with @Configuration
In this class I defined couple of methods to access external REST api for this connector.
I define apiURL and their version to use inside my annotated method
@Configurable
@Optional
@Default("https://platform.vanrish.com/api")
private String apiUrl;

@Configurable
@Optional
@Default("v1")
private String apiVersion;
Here are annotation definition for connector
@Configurable — Allow to configure this field
@Optional —This field is not mandatory
@Default —This is providing default value for field
Here is full code snippet
package org.mule.modules.vanrish.config;

import org.mule.api.annotations.components.Configuration;
import org.mule.api.annotations.Configurable;
import org.mule.api.annotations.param.Default;
import org.mule.api.annotations.param.Optional;

@Configuration(friendlyName = "Configuration")
public class ConnectorConfig {

/**

* Vanrish API Url

*/

 @Configurable
 @Optional
 @Default("https://platform.vanrish.com/api")
 private String apiUrl;

 @Configurable
 @Optional
 @Default("v1")
 private String apiVersion;

 public String getApiUrl() {
  return apiUrl;
 }

 public void setApiUrl(String apiUrl) {
  this.apiUrl = apiUrl;
 }

 public String getApiVersion() {
  return apiVersion;
 }

 public void setApiVersion(String apiVersion) {
  this.apiVersion = apiVersion;
 }
}
In advance connector writing you can create client java class and use above apiURL and version to access api method and execute to get result.
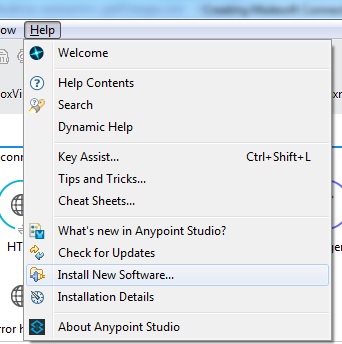
Now to build this project in Anypoint studio, you need to select project and right click. This action will pop up option window. Here in this window you need to select Anypoint Connector then click Build connector.
Steps — Right Click on project –>Anypoint Connector –> Build Connector
Here it is shown in the picture below
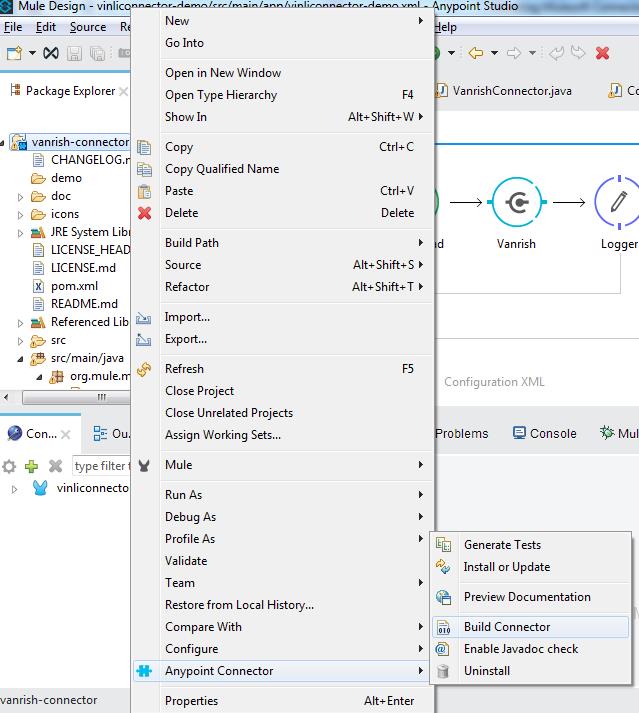
This action will build your connector.
Follow the same steps to install your connector into Anypoint studio.
Steps — Right Click on project –> Anypoint Connector –> Install or Update
This action will install your connector into Anypoint studio.
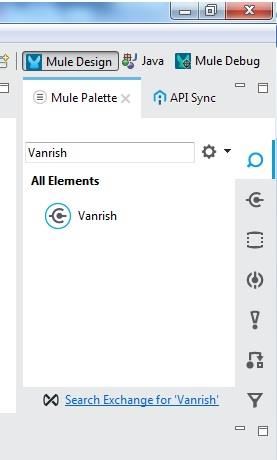
After installing your connector,you can search your connector name into Anypoint studio.
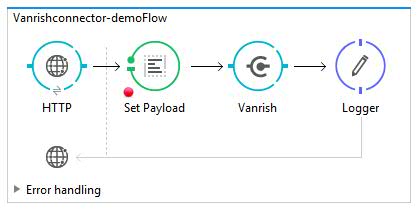
Connector Testing
you can create small flow in Anypoint studio and test your connecotor.
Here is example to test my connector
Rajnish Kumar, the CTO of Vanrish Technology, brings over 25 years of experience across various industries and technologies. He has been recognized with the “AI Advocate and MuleSoft Community Influencer Award” from the Salesforce/MuleSoft Community, showcasing his dedication to advancing technology. Rajnish is actively involved as a MuleSoft Mentor/Meetup leader, demonstrating his commitment to sharing knowledge and fostering growth in the tech community.
His passion for innovation shines through in his work, particularly in cutting-edge areas such as APIs, the Internet Of Things (IOT), Artificial Intelligence (AI) ecosystem, and Cybersecurity. Rajnish actively engages with audiences on platforms like Salesforce Dreamforce, World Tour, Podcasts, and other avenues, where he shares his insights and expertise to assist customers on their digital transformation journey.