
In my previous blog I explained new Mule 4 feature and enhancement of Mule runtime. To support these feature Mulesoft released new editor with new look and feel. If you are coming from Mule 3 and its Anypoint studio, you will not find much difference but there is lot of makeover of editor and some cool feature in Anypoint studio 7.0. With new Anypoint studio, it accelerates developer productivity with a single graphical environment for integration with SaaS and on-premises systems, API implementation, and testing. It Deploys your applications on-premises or in the cloud with Mule runtime engine. Anypoint Studio is MuleSoft’s Eclipse-based integration development environment for designing and testing Mule applications.
Now let’s move on new Anypoint studio features and configuration.
1. Installation & Configuration – Download and installation of Anypoint studio is available based on operating system. Download your Anypoint studio based on your operating system. Make sure JDK 1.8 in install and configure in your system before installation of Anypoint studio. This version of Studio is not compatible with Java 9 or Java 10. MuleSoft recommends a minimum of 4GB of free RAM, 2GHz CPU and 10GB free hard drive space available on a developer workstation. To install Anypoint studio you need to extract your download zip file and set your workspace area in your system. If you are still getting java error during your Anypoint start. Please open AnypointStudio.ini file and add this line in this file
-vm C:\software\java\bin2. Maven – This version of Anypoint studio comes with Maven installation default. You no need to install maven separately like previous version. Studio comes with Maven 3.3.9 bundled, but you can externally use the versions: 3.3.3 or your own 3.3.9.
3. Mule palette — If you are coming from previous version of Anypoint studio you will find extreme make over for Mule palette in newer version of Anypoint studio. It has added couple of section and related action in this Mule palette to speed up the development process. It created two level of palette to improve access times, discoverability and categorization. You can search connector and add modules from Mule palette. You can also search your project/modules in exchange from Mule palette. There is Favorites section you can add most used connector and action. Here is couple of sections of Mule palette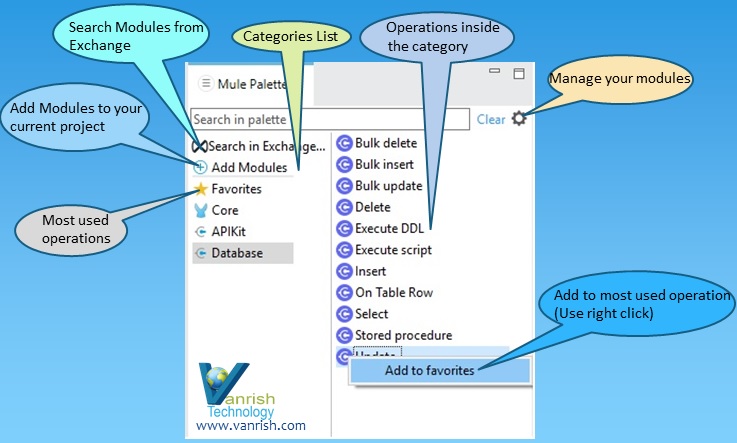
- Category List
- Manage you modules
- Operation inside the category
- Search Modules from Exchange
- Add Modules to your current project
- Favorites
- Add to favorites
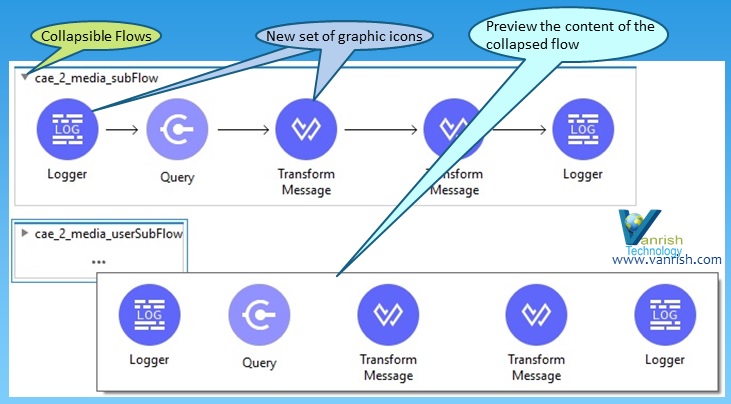
4. Editor/Canvas—Studio editors help you design and edit the definitions of your applications, APIs, properties, and configuration files. In canvas you can see all visual representation of your flows. These flows are collapsible Flows. In new Anypoint editor you can now preview the content of the collapsed flow by simply hovering over the region for a second. New version editor it added new set of graphic icons for better usability. In new Anypoint studio new feature added to navigate from visual view to XML view by simple right clicking on any component and select “Go to XML”
5. Managing Anypoint platform credential—Through Anypoint studio you can manage and configure Anypoint Platform credentials. To enable this feature you have to browse in Anypoint studio top navigation
Window->preference->Anypoint Studio->Authentication->Add
Now here you can add multiple user Anypoint platform credential.
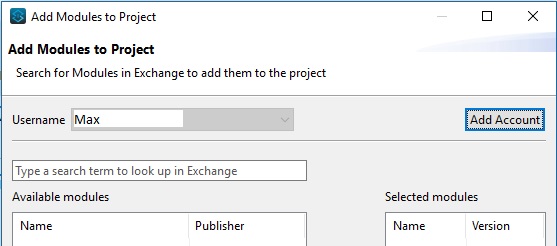
Once you add here now when creating a new Mule project (File > New > Mule Project), if you select an API implementation from Design Center, the toolbar displays at the top of the selection dialog.


Similarly, if you select Search in Exchange from the Mule Palette, the toolbar displays in a slightly different form.
6. Dataweave everywhere— As Mule 4 supporting Dataweave is default language. Now you can see new Anypoint editor enable Dataweave for all component. You can now toggle between “literal” and “Expression” modes using the new expression button. When clicking the “Expression” mode, you can use auto-suggestions for Dataweave 2.0.
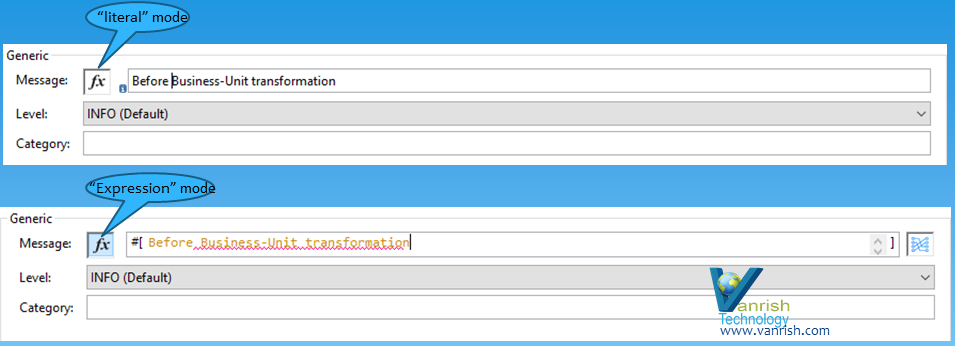
Additionally, using the expression mode, you can click the New Map button next to Fields to use the visual mapper to build expressions for individual fields.

Conclusion—New Anypoint studio accelerates developer productivity with a single graphical environment for integration with SaaS and on-premises systems, API implementation, and testing. Studio enables you to deploy your applications on-premises or in the cloud with Mule runtime engine.
Rajnish Kumar is CTO of Vanrish Technology with Over 25 years experience in different industries and technology. He is very passionate about innovation and latest technology like APIs, IOT (Internet Of Things), Artificial Intelligence (AI) ecosystem and Cybersecurity. He present his idea in different platforms and help customer to their digital transformation journey.